
Article
With promotions, you have an additional method to monetize your directory. By enabling this feature, your users are able to promote their listings and push it at the top of the results.
Enabling Promotions
Promotions will be enabled the moment you create a promotion package.
Creating a Promotion Package
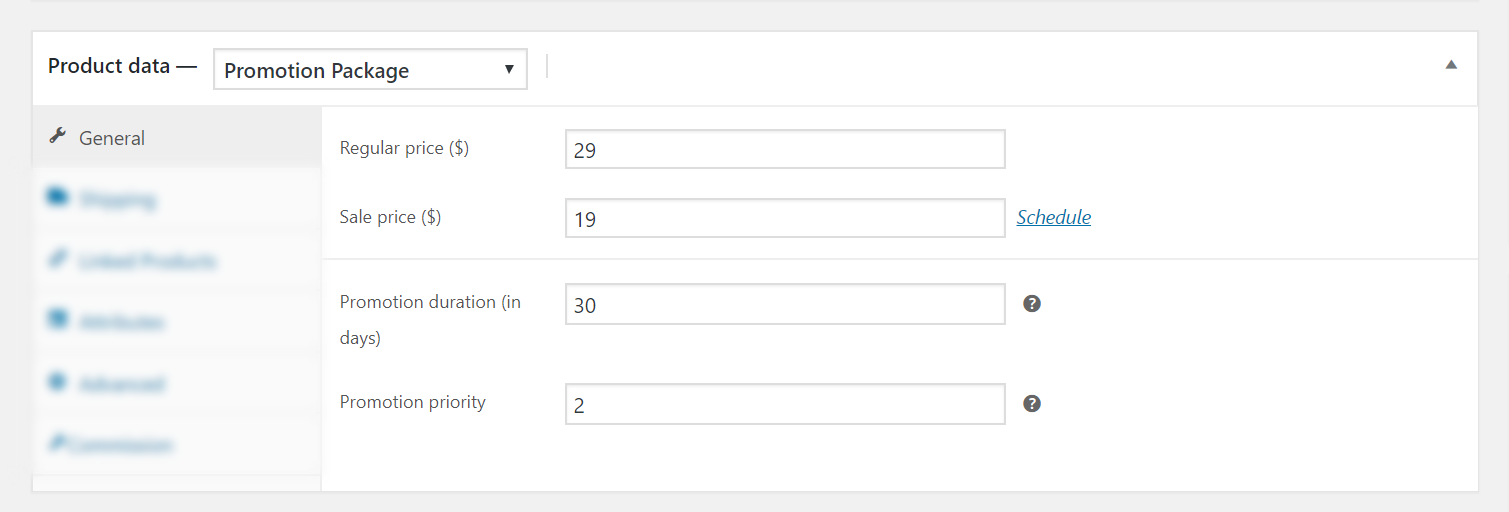
Promotion Packages can now be created as WooCommerce Products. In WP Admin > Products, click Add New. Give a name to the product, such as “Premium Promotion”, and under “Product Data” select “Promotion Package”.
You should now see additional promotion related settings. Set a price, promotion duration, promotion priority, and click Publish.
Promotion Duration: Number of days the listing will be promoted from the moment the payment and order is completed. After this, the listing will automatically revert back to it’s old priority settings.
Promotion Priority: A numeric value for the priority that will be given to listings with this package. Higher value means higher priority in search results. The recommended value is 2, but you can have more expensive packages that give an even higher priority.
You can create multiple promotion packages, with difference pricing, duration, and priority. They will be displayed to users ordered by price, from lowest to highest price.
Promoting a Listing (User Experience)
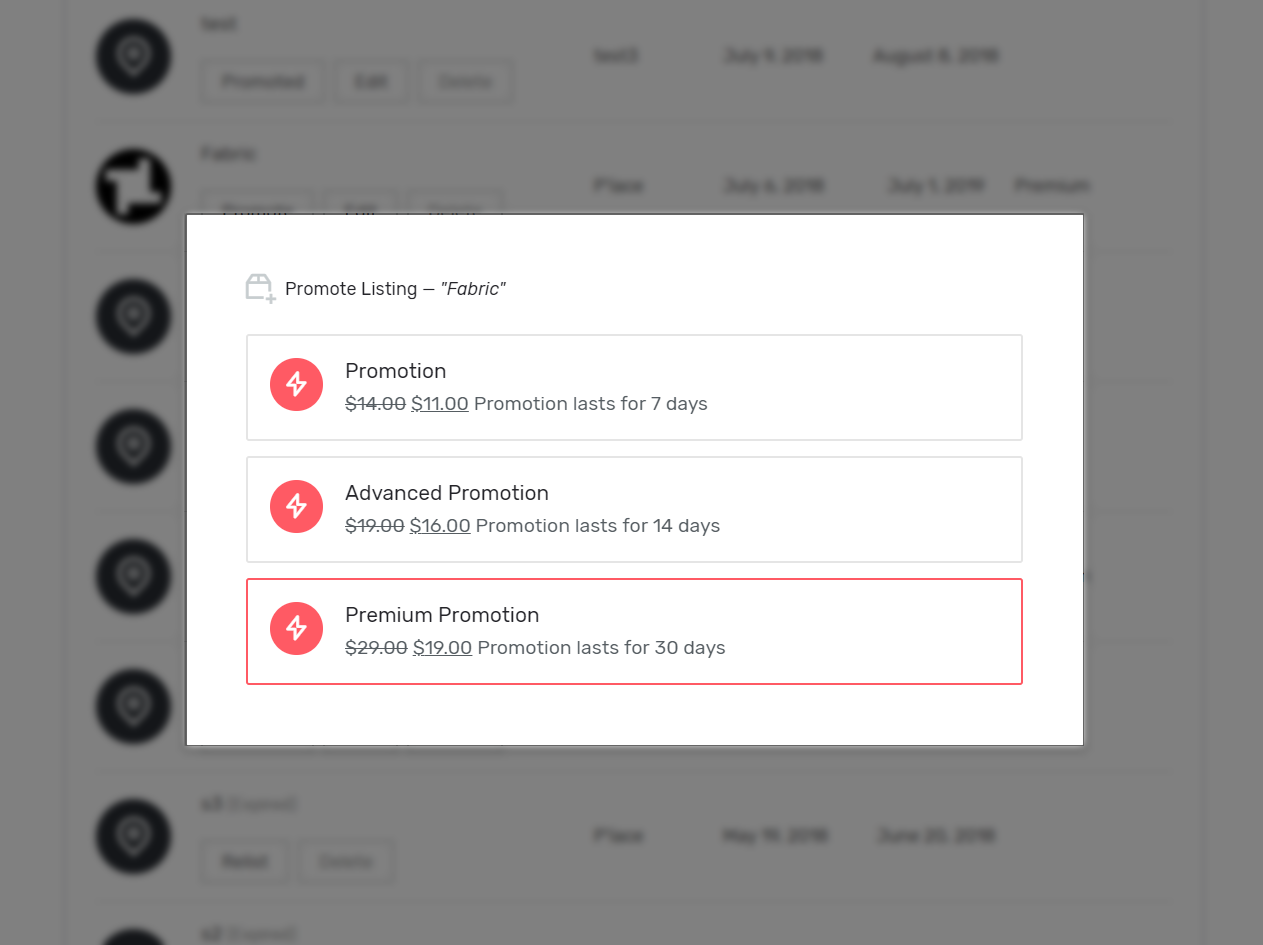
Once you have setup promotions following the steps above, a new “Promote” button will appear under each listing in User Dashboard > My Listings.
Clicking on it will open a pop-up with the list of promotion packages the user can choose from. After the user decides which one to buy, they can click on the package, and will be redirected immediately to the Checkout page.
Once the order is placed, verified, and completed, the listing will be automatically promoted and given the higher priority in search results.
It’s also worth mentioning that if the user buys a promotion package directly from the Shop page, they will appear in the pop-up too, under the “Owned Packages” label. Those can be used then immediately to promote the listing, as the order has already been completed.
Active promotions can be managed by users in User Dashboard > Promotions.
Promoting a Listing (Admin Experience)
All user promotions can be seen in WP Admin -> Users -> Promotion Packages. When a listing is promoted, a new item is added in this page, with the listing, product, order, duration, and user information.
You can also manually create promotions in this page, by clicking on “Promote a Listing” at the top of the page. In this case, only the listing and duration fields need to be filled. These manual packages won’t be visible in the front-end of the site, to the users that own those listings.
Manually setting listing priority
In addition to promotion packages, the site owner can also manually set the listing priority. This will override the priority set by promotion packages, if the listing has any.
This can be done through WP Admin -> Listings -> Edit Listing. In the right sidebar area, there’s a new “Listing Priority” section.

How search results work
Search results in Explore page will be ordered by priority first, then by other ordering clauses. Promoted listings have the highest priority, then Featured listings, and finally listings without any priority set are shown.
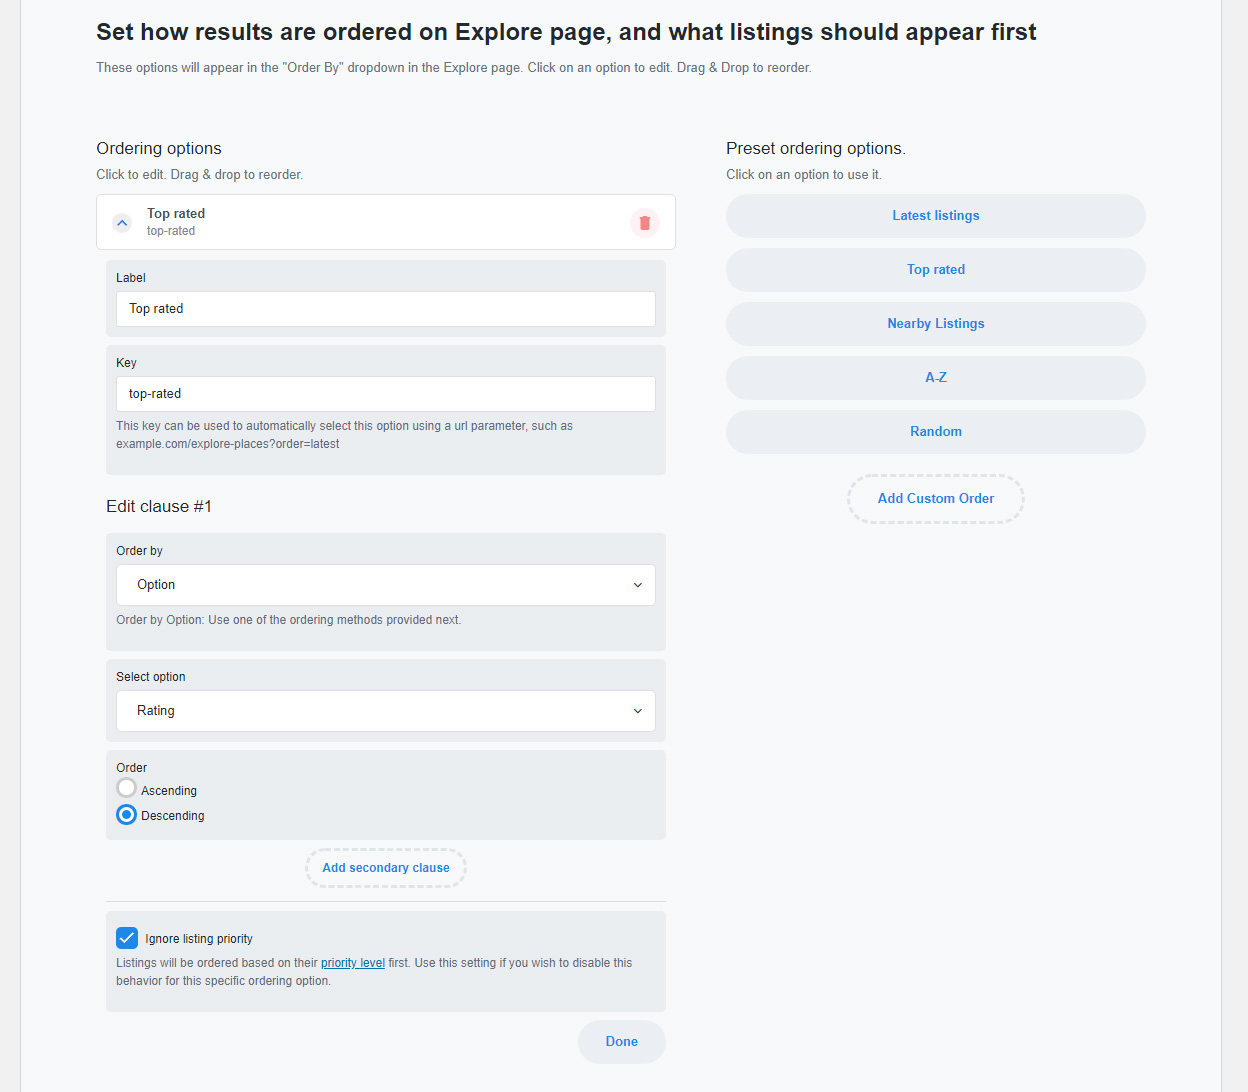
There are some cases when you may want to ignore listing priority when displaying search results, for example if you want to show listings based on rating. This is made possible by a new setting in the Listing Type Editor. Go to Search Forms -> Listing Order, click on an option, and at the bottom you can check “Ignore listing priority”.
Final Result
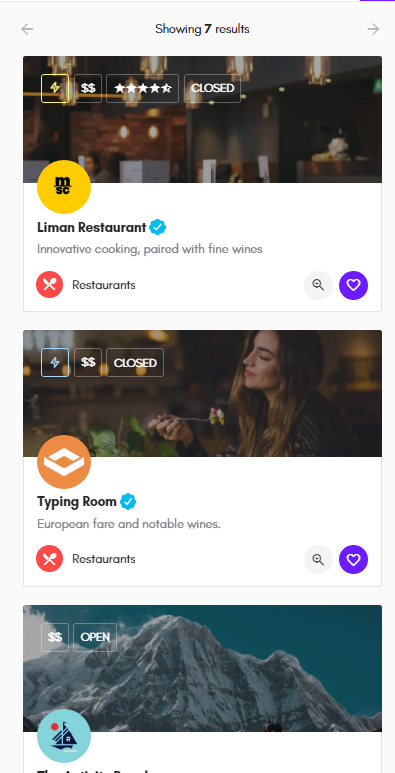
Promoted and Featured listings will appear at the top of search results, and they are now always relevant to the active search query/filters. Based on level of priority, listings will either have a gold badge (promoted listings), or a blue one (featured listings).
